> For the complete documentation index, see [llms.txt](https://docs.pollination.solutions/user-manual/llms.txt). Markdown versions of documentation pages are available by appending `.md` to page URLs; this page is available as [Markdown](https://docs.pollination.solutions/user-manual/rhino-plugin/pollination-commands/by-use-case/category_1.md).
# Geometry Setup
## `Rooms`
## PO\_AddRooms
Convert closed geometries to rooms. New created rooms contains default energy and radiance properties. Use "Pollination" command to open Room Manager to check and edit each room.
### Options
* **Property**
override the default room properties, such as construction set, program type, hvac, and internal loads. (default: Default)
* **SkipExistingRoom**
set to Yes to only convert non-room geometries (default: Yes)
* **MaxRoofAngle**
change the max angle for how much a surface is tilted will be set to roof type. Any surface tilted between 0 and max angle will be set to roof (default: 30)
### See Also
* [PO\_AddRoomsByLayer](/user-manual/rhino-plugin/pollination-commands/alphabetically/po_addroomsbylayer.md)
* [PO\_DrawRoom](/user-manual/rhino-plugin/pollination-commands/alphabetically/po_drawroom.md)
***
## PO\_AddRoomsByLayer
Convert closed geometries to rooms by layers. Use "Pollination" command to open Room Manager to check and edit each room.
Notes:
* It uses a window where it is possible to set energy and radiance properties.
* Use checkboxes to select layer where solids to convert are.
* Layer name is used for creating each room's display name
### See Also
* [PO\_AddRooms](/user-manual/rhino-plugin/pollination-commands/alphabetically/po_addrooms.md)
* [PO\_DrawRoom](/user-manual/rhino-plugin/pollination-commands/alphabetically/po_drawroom.md)
***
## PO\_DrawRoom
Draw a room.
### Options
* **2Points**
Draw a rectangle by 2 points.
* **3Points**
Draw a rectangle by 3 points.
* **FreeForm**
Draw a closed polygon. Press enter to close the polygon.
* **ElevationByPoint**
Pick a point to automatically get the FloorElevation.
* **Elevation**
Reference height to consider as floor level. CPlane where to draw.
* **Height**
Height of the room.
### See Also
* [PO\_AddRooms](/user-manual/rhino-plugin/pollination-commands/alphabetically/po_addrooms.md)
* [PO\_AddRoomsByLayer](/user-manual/rhino-plugin/pollination-commands/alphabetically/po_addroomsbylayer.md)
### Useful Links
{% embed url="" %}
### Video Tutorials
{% embed url="" %}
Create a Pollination Model by Tracing CAD Plan
{% endembed %}
{% embed url="" %}
Draw New Rooms
{% endembed %}
***
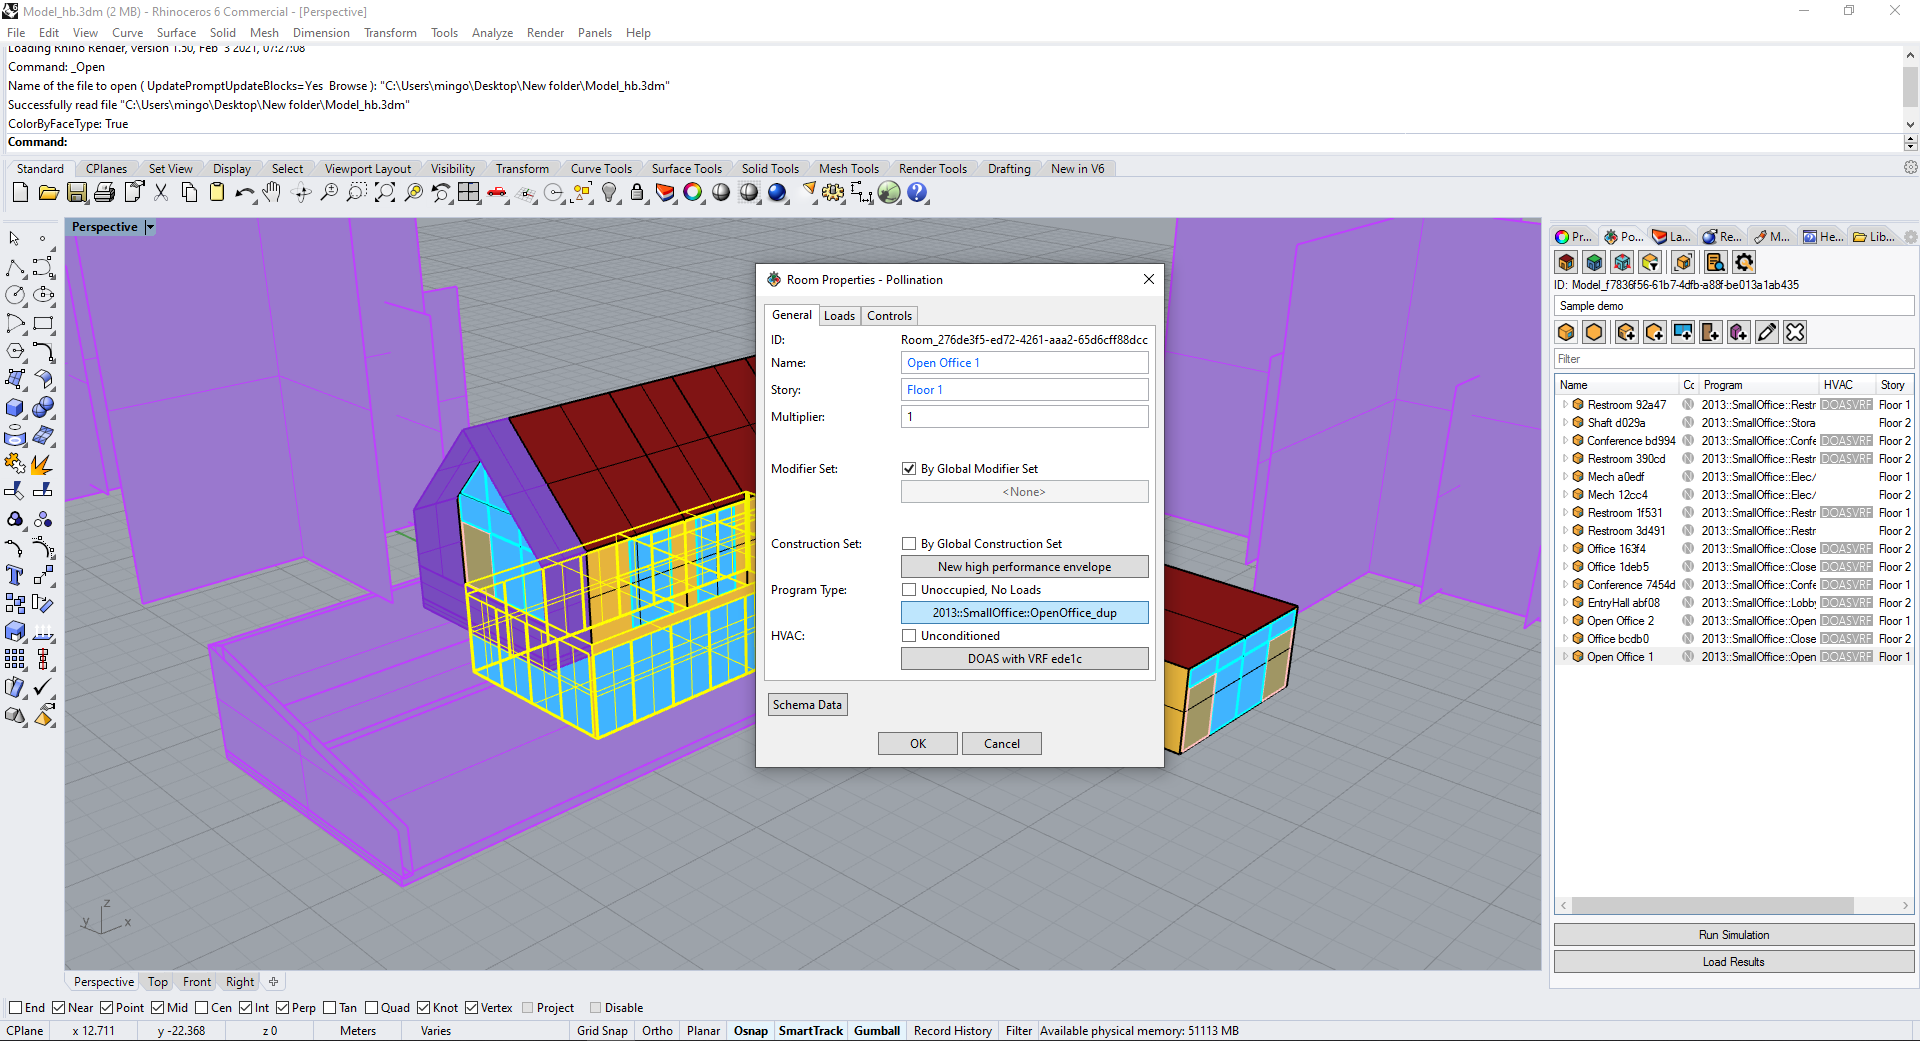
## PO\_EditRoomProperties
Edit room properties for one or more selected rooms.
Edit Room Properties
***
## PO\_GenRoomPerimeters
Split room and generate core/perimeter rooms.
Split a room to perimeter and core rooms
### See Also
* [PO\_SplitRooms](/user-manual/rhino-plugin/pollination-commands/alphabetically/po_splitrooms.md)
***
## PO\_MatchRoomProperties
Duplicate all Honeybee properties from a source room to selected target rooms or solid Breps.
Notes:
* It does not change the geometry part of the first selection.
* The first selection will have the same energy and radiance properties of the second selection.
* It is possible to select what properties to copy from the target to source.
***
## PO\_MergeRooms
Merge multiple rooms into one room.
Notes:
* Select a host room first for other rooms to merge into, and the host room's properties will be assigned to new merged room.
***
## PO\_RebuildRooms
Rebuild selected rooms with following options: 1) merge all coplanar faces; 2) rebuild all room faces; 3) reset all boundary conditions; In this command, it also checks all child objects (apertures and doors)'s normal to be matched with their host surfaces.
### Options
* **MergeCoplanar**
set to true to merge all coplanar faces. This is similar to the Rhino's command MergeAllCoplanarFaces. (default:true)
* **RebuildFaces**
when set to true, this option recreates each planar face from the duplicated naked edge curves of the original geometry. It is also useful for removing tiny "invalid" face with an area smaller than tolerance squared. Additionally, setting this to true will reset the face type based on its normal. Face type with AirBoundary will be kept even RebuildFaces is set to True. You can use PO\_ResetFaceType command to reset all room faces including air boundaries. (default:false)
* **ResetBoundaryConditon**
when this option is set to true, it resets all faces's boundary condition to Outdoor. Unless a face is below the Z 0, then its boundary condition will be set to the Ground. (default:true)
* **FixApertureDoors**
set to true to check all child objects (apertures and doors) to ensure they are coplanar with their host faces.
***
## PO\_SelOpaqueFaces
Select all visible orphaned faces in the current Rhino document.
***
## PO\_SelRoomFaces
Select all visible rooms's faces in the current Rhino document.
### Video Tutorials
{% embed url="" %}
Select all Wall/AirBoundary type faces of rooms
{% endembed %}
***
## PO\_SelRooms
Select all visible rooms in the current Rhino document.
***
## PO\_SplitRooms
Split rooms by selected cutters. The selected existing cutter has to cut through the entire room so that it could perform a clean cut.
### Options
* **SelectCutter**
Select an existing cutter surface.
* **Surface**
Draw a new cutter surface.
* **Line**
On top view, draw a line as a cutter that cuts through vertically.
* **Plane**
Draw a new infinite large plane as a cutter.
### See Also
* [PO\_GenRoomPerimeters](/user-manual/rhino-plugin/pollination-commands/alphabetically/po_genroomperimeters.md)
### Video Tutorials
{% embed url="" %}
Split a room by cutters
{% endembed %}
***
## `Surfaces`
## PO\_AddOpaqueFaces
Add orphaned faces from selected geometries. Use "Pollination" command to open Orphaned Object Manager to check and edit each orphaned face.
### Options
* **Property**
Set energy and radiance properties.
* **Default**
It inherits properties from the parent object.
* **Custom**
It shows a window where to set energy and radiance properties.
* **NameByLayer**
Use layer's name for object's display name
Notes:
* It works with planar geometry only.
* It supports planar surfaces or brep with planar faces.
***
## PO\_DrawPlanarSurface
Set CPlane and draw plane surfaces on it.
### Options
* **2Points**
Draw a rectangle by 2 points.
* **3Points**
Draw a rectangle by 3 points.
* **FreeForm**
Draw a closed polygon. Press enter to close the polygon.
***
## PO\_EditFaceProperties
Edit face properties for one or more selected faces.
### Video Tutorials
{% embed url="" %}
How to Change the Construction for a Single Face
{% endembed %}
***
## PO\_SelOpaqueFaces
Select all visible orphaned faces in the current Rhino document.
***
## `Apertures, Skylights & Doors`
## PO\_AddApertures
Add planar window surfaces to selected rooms or orphaned faces. For adding an orphaned apertures, press ENTER to skip selecting the host objects. Use "Pollination" command to open Room Manager or Orphaned Object Manager to check and edit each hosted window object or orphaned apertures.
### Options
* **Property**
Set energy and radiance properties.
* **Default**
It inherits properties from the parent object.
* **Custom**
It shows a window where to set energy and radiance properties.
* **NameBy**
Use layer's name for object's display name
Notes:
* Aperture surfaces will only be added to a room when it is coplanar to one of the room's faces.
* A valid aperture geometry could be a brep or extrusion with a single surface.
### See Also
* [PO\_DrawApertures](/user-manual/rhino-plugin/pollination-commands/alphabetically/po_drawapertures.md)
***
## PO\_AddAperturesByWWR
Add apertures by window to wall ratio for each outdoor walls of selected rooms. Use "Pollination" command to open Room Manager or Orphaned Object Manager to check and edit each hosted window object.
### Options
* **WindowWallRatio\_North**
Set a number between 0 to 1 for WWR. Default: 0.4 (40%).
* **WindowWallRatio\_East**
Set a number between 0 to 1 for WWR. Default: 0.4 (40%).
* **WindowWallRatio\_South**
Set a number between 0 to 1 for WWR. Default: 0.4 (40%).
* **WindowWallRatio\_West**
Set a number between 0 to 1 for WWR. Default: 0.4 (40%).
* **Subdivide**
Boolean to note whether to generate a single window in the center of each Face(False) or to generate a series of rectangular apertures using the other inputs below (True). Default: No.
* **Window\_Height**
A number for the target height of the output apertures.
* **Sill\_Height**
A number for the target height above the bottom edge of the face to start the apertures.
* **Horizontal\_Separation**
A number for the horizontal separation between individual aperture centerlines.
* **Vertical\_Separation**
An optional number to create a single vertical separation between top and bottom apertures. Default: 0.0.
Notes:
* Set the ratio to 0 to skip the aperture creation in the specific direction.
### See Also
* [PO\_AddSkylightsByRatio](/user-manual/rhino-plugin/pollination-commands/alphabetically/po_addskylightsbyratio.md)
### Video Tutorials
{% embed url="" %}
Add Apertures
{% endembed %}
***
## PO\_AddDoors
Add planar door surfaces to selected rooms or orhpaned faces. For adding an orphaned door, press ENTER to skip selecting the host objects. Use "Pollination" command to open Room Manager or Orphaned Object Manager to check and edit each hosted door object or orphaned door.
### Options
* **Property**
Set energy and radiance properties.
* **Default**
It inherits properties from the parent object.
* **Custom**
It shows a window where to set energy and radiance properties.
* **NameByLayer**
Use layer's name for object's display name
Notes:
* Door surface will only be added to a room when it is co-planar to one of room walls.
* A valid door geometry could be a brep or extrusion with single surface.
### Video Tutorials
{% embed url="" %}
Add doors to rooms
{% endembed %}
***
## PO\_AddSkylightsByRatio
Add skylights by ratio for each outdoor roof of selected rooms.
### Options
* **Ratio**
Set a number between 0 to 1 for the skylight ratio. Default: 0.4 (40%).
* **Dimension\_X**
The x dimension of the grid cells as a number.
* **Dimension\_Y**
The y dimension of the grid cells as a number.
### See Also
* [PO\_AddAperturesByWWR](/user-manual/rhino-plugin/pollination-commands/alphabetically/po_addaperturesbywwr.md)
***
## PO\_DrawApertures
Draw apertures on a selected room's surface
### Options
* **ElevationPlan**
Draw onto selected faces.
* **2Points**
Draw a rectangle by 2 points.
* **3Points**
Draw a rectangle by 3 points.
* **FreeForm**
Draw a closed polygon. Press enter to close the polygon.
* **FloorPlan**
Pick points which represent apertures in the plan.
* **ElevationByPoint**
Pick a point to automatically get the FloorElevation.
* **FloorElevation**
Reference height to consider as floor level.
* **SillHeight**
Distance between bottom of aperture frame to floor level.
* **Height**
Height of the aperture.
### See Also
* [PO\_AddApertures](/user-manual/rhino-plugin/pollination-commands/alphabetically/po_addapertures.md)
* [PO\_AddAperturesByWWR](/user-manual/rhino-plugin/pollination-commands/alphabetically/po_addaperturesbywwr.md)
### Video Tutorials
{% embed url="" %}
Draw Apertures
{% endembed %}
{% embed url="" %}
Create a Pollination Model by Tracing CAD Plan
{% endembed %}
***
## PO\_DrawDoors
Draw doors on a selected room's surface.
### Options
* **2Points**
Draw a rectangle by 2 points.
* **3Points**
Draw a rectangle by 3 points.
* **FreeForm**
Draw a closed polygon. Press enter to close the polygon.
***
## PO\_DupAperturesDoors
Duplicate apertures and doors from one location to another point. The duplicated apertures and doors will be automatically added to any coplanar room faces or orphaned faces. If no coplanar host face found, they would be added as orphaned apertures and orphaned doors.
Duplicate apertures and doors in your model.
***
## PO\_EditApertureProperties
Edit aperture properties for one or more selected apertures.
***
## PO\_EditDoorProperties
Edit door properties for one or more selected doors.
***
## PO\_MatchChildGeometry
This command updates the source geometry from the guide geometry while keeping all other properties.
Notes:
* It changes the aperture or door dimensions of the first selection.
* It does not change the energy and radiance properties of the first selection but just the dimensions and the location of the geometry part.
* The first selection will have the same aperture/door dimensions of the second selection.
***
## PO\_OffsetChildObjects
Offset all child objects (apertures and doors) of selected rooms to ensure they don't touch the edges of rooms. Only child object's edges that are within the `OffsetDistance` from their host room face's edge will be offsetted.
Notes:
* If the aperture has an edge coincident to an edge of the room it is not valid for energy simulation.
Offset child objects
### Options
* **IgnoreInsideEdges**
Set to Yes to ignore those edges are already inside the host room face boundary. Set to No to check all edges and ensure all of them are at least from the `OffsetDistance` of the host face boundary.
* **OffsetDistance**
A value that defines how far from the host room face's boundary that limits child's object
### See Also
* [PO\_ProjectChildToHost](/user-manual/rhino-plugin/pollination-commands/alphabetically/po_projectchildtohost.md)
### Video Tutorials
{% embed url="" %}
How to Fix Problematic Apertures
{% endembed %}
***
## PO\_ProjectChildToHost
Check all child objects (apertures and doors) of selected rooms to ensure they are coplanar with their host faces.
Notes:
* This command will automatically project the child geometry to its host's plane.
* It is important apertures and doors are coplanar to get a valid energy and radiance model.
### See Also
* [PO\_OffsetChildObjects](/user-manual/rhino-plugin/pollination-commands/alphabetically/po_offsetchildobjects.md)
### Video Tutorials
{% embed url="" %}
How to Fix Problematic Apertures
{% endembed %}
***
## PO\_SelApertures
Select all visible apertures in the current Rhino document.
### Options
* **SelectBy**
All or Orientation
***
## PO\_SelDoors
Select all visible doors in the current Rhino document.
***
## `Context`
## PO\_AddSiteContext
Add selected geometries as site contexts to model. This can be used to add trees, surrounding buildings, or site structures that are not directly attached to the building. Use "Pollination" command to open Orphaned Object Manager to check and edit each shade object.
### Options
* **NameByLayer**
Use layer's name for object's display name
Notes:
* The selection can be a brep or a series of surfaces.
* If the selection contains a brep with curved brep faces they will be planarized automatically.
***
## PO\_SelSiteContexts
Select all visible site contexts in the current Rhino document.
***
## `Shades`
## PO\_AddApertureShades
Add shades to apertures. It works with two different modalities, BorderShades and LouverShades.
### Options
* **SkipExistingShadeParent**
Set to Yes to restrict the selection to only parent objects with no shades (default: Yes).
* **Depth**
A number for the depth to extrude the louvers.
* **Indoor**
Optional boolean for whether louvers should be generated facing the opposite direction of the aperture normal.
* **Angle**
A number for the for an angle to rotate the louvers in degrees.
* **Distance\_between**
A number for the approximate distance between each louver.
* **Shade\_count**
A positive integer for the number of louvers to generate.
* **Depth**
A number for the depth to extrude the louvers.
* **Facade\_offset**
A number for the distance from the louver edge to the facade.
* **Flip\_start**
Optional boolean to note whether the side the louvers start from should be flipped.
* **Vertical**
Optional boolean to note whether the lovers are vertical.
***
## PO\_AddBuildingShades
Add selected shade surfaces to model. Use "Pollination" command to open Orphaned Object Manager to check and edit each shade.
### Options
* **NameByLayer**
Use layer's name for object's display name
Notes:
* The selection can be a brep or a series of planar surfaces.
* If the selection contains a brep with curved brep faces they will be planarized automatically.
***
## PO\_AddShades
Add shades to a host. A host can be room, orphaned face, aperture, or door. Use "Pollination" command to open Room Manager or Orphaned Object Manager to check and edit each hosted shade object.
### Options
* **ShadeType**
set whether new shades are indoor or outdoor types. In several Radiance recipes, indoor shades will be removed in the simulation in order to meet the code requirements. (default: indoor)
### Video Tutorials
{% embed url="" %}
Add shades from Rhino geometry
{% endembed %}
{% embed url="" %}
Add shades to a room's aperture
{% endembed %}
***
## PO\_EditShadeProperties
Edit Shade properties for selected Shades.
***
## PO\_SelShades
Select all visible shades in the current Rhino document.
***